
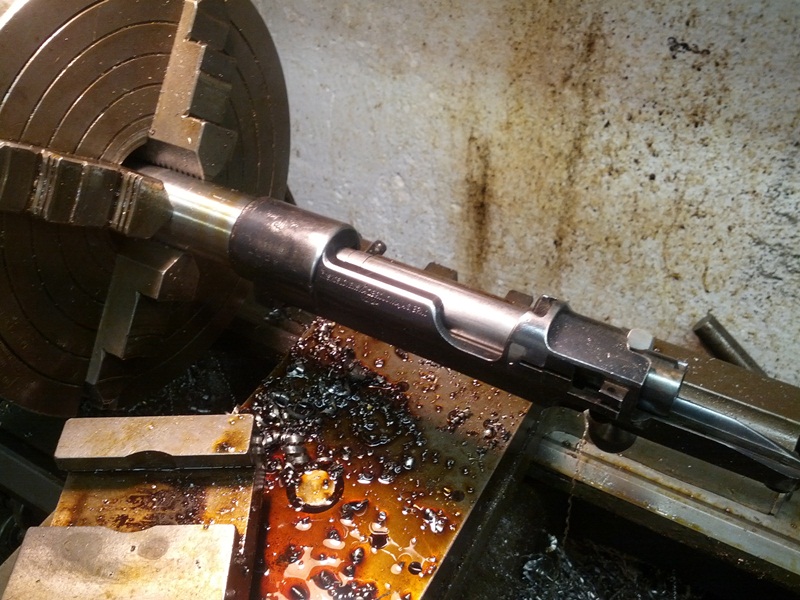
| We normally make our own reamers but I had the dies and the barrel arrived sooner than expected. I was getting antsy and our Cincinnati grinder was configured for another project so I went retail. A chat with Dave Kiff at Pacific and $135 later I had the finisher. Not a bad deal when you add up the hours it takes to grind them yourself. Before we chambered the Shilen the bolt lugs were lapped in with Clover compound. Here are some shots of that process plus us chambering the Shilen: |


|
|
|
|
| Chambering and the receiver test fit post-threading. Overall barrel length was set to 28.5": |


| I’ll save photos of the finished gun until the end. Let’s move on to case forming. Step one is to run a well lubed .257 through the Clark FL sizer. It'll only take one pass but be sure to rotate the case 180 degrees for another pull. This will better align the mouth if the die is off a smidge. The neck walls on my Remington Roberts averaged 0.0155”. The thinnest measured 0.0141”, the thickest 0.0164”, or 0.0023” total run-out across the twenty I mic’d. Clark turned his to 0.0142” but that won’t clean-up to my liking. Besides, our reamer cut a 0.254” neck on the bump gauge. The bullets are 0.224” so that leaves 0.030” clearance sans sidewall. If I turned to Clark’s 0.0142” the loaded round would be 0.2524” with 0.00160” total clearance. Way too close, even for competitive shooting. After a little plug and chug I settled on 0.0135”. This translates to 0.2510” loaded and a reasonably tight 0.0030” gap (0.0015” per edge). 0.248” to 0.250” sizing buttons place neck tension between 0.001” and 0.003”. |


|
|
| I do want to touch briefly on neck turning and doughnuts. Failing to nick the shoulder ~0.002 will cause a high spot. Well let me re-phrase that. A high spot will appear when the shoulder is repositioned and the uncut section is sized. So let’s say you prep the neck as follows: Stock neck thickness = 0.0160” Turned neck thickness = 0.0135” Total delta = 0.007” (both sides added together) Now pretend your button is 0.251” which is a no tension scenario. The wall is thinned to 0.0135” for 0.251", anything more causes pinch. If the shoulder is bumped 0.002”, and the first 0.002” of the shoulder itself isn’t thinned, you’ll get a doughnut. Put another way, you're running 0.0160" worth of wall thickness through a ring designed for 0.0135". The doughnut comes from the unlathed portion being sized. Since the collar doesn’t budge at 0.251” the brass gets pushed inward. This crease becomes even more pronounced after the first firing. |


|
|
 |
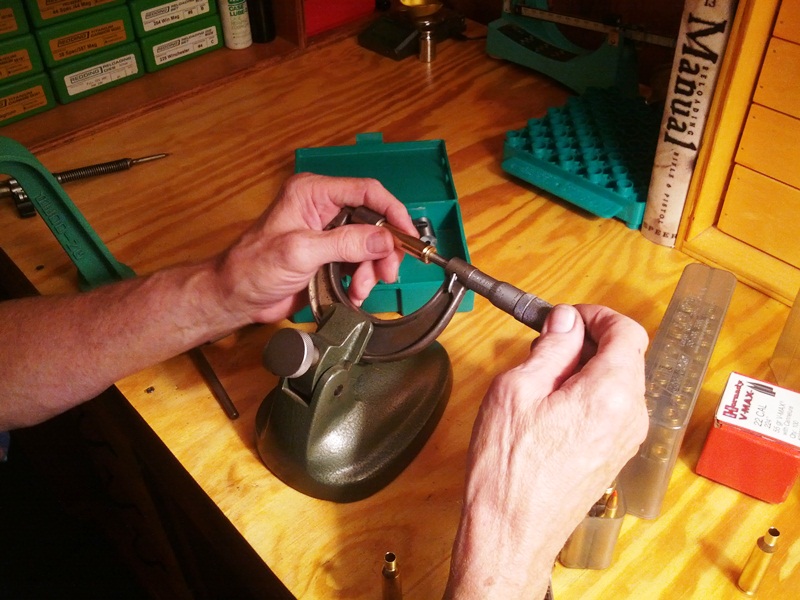
| Now there is differing opinion on whether doughnuts hurt accuracy. I can’t say if they do or don’t. But if the bullet extends into the shoulder you’ll want to ream them out. Otherwise it is like adding a second pressure ring. Layne Simpson recommended 19.0 of 2400 and a 50 grain bullet for fire- forming. That sounded light, especially since I want a sharply defined edge after the first shot. Instead I used 30.0 of IMR 3031 and a 55 gr Hornady V- Max (3,128 fps, 28.5” barrel). Potent enough to form fit the brass but mild enough to spare the barrel. Neck tension was put at 0.002” and the V-Max was seated out. With the Clark's long throat though I was unable to jam the bullet. When fire-forming I prefer to hard seat into the rifling, usually ~0.010”. This maintains firm thrust on the bolt for consistent shoulder positioning. The neck length roughly matches the Roberts so there was still adequate support without jam. |

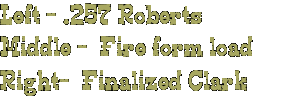
| After fire-forming we used our bump gauge for FL sizing. The gauge is made with the finishing reamer and includes the neck and shoulder. No portion of the main hull is present. Begin by measuring a fired case in the collar. Overall length should represent the shoulder touching the chamber wall. Record this figure as "Fired OAL". Deprime the shell first though because high caps can create false readings. It is also important to decap without shoulder sizing. The easiest way to do this is with a universal depriming tool. If you don't have one you can drop the expander 1/2" while backing the die body off 360 degrees. Then reset the FL sizer and screw it down slowly, I like 1/10 turns at a time. After each adjustment measure the base of the shell to the top of the gauge. When total length decreases by 0.001” over "Fired OAL" you're done. |


 |
| We checked for doughnuts with a 0.222" pin gauge and found none. Relief cutting the shoulder worked as planned. And if you’re wondering why a 0.222” pin instead of 0.224” spring-back is the reason. Necks typically retract a thou or two once the bullet exits. |

 |
 |

